Making A (Modern!) Edwardian Walking Skirt || Historical Style
I am obsessed with the idea of bringing details of historical dress into the modern wardrobe. Because after all, when you’ve devoted your life to studying the stunning craftsmanship of clothing from the past, it’s really difficult to settle for the simplicity and ephemerality of fast fashion today.
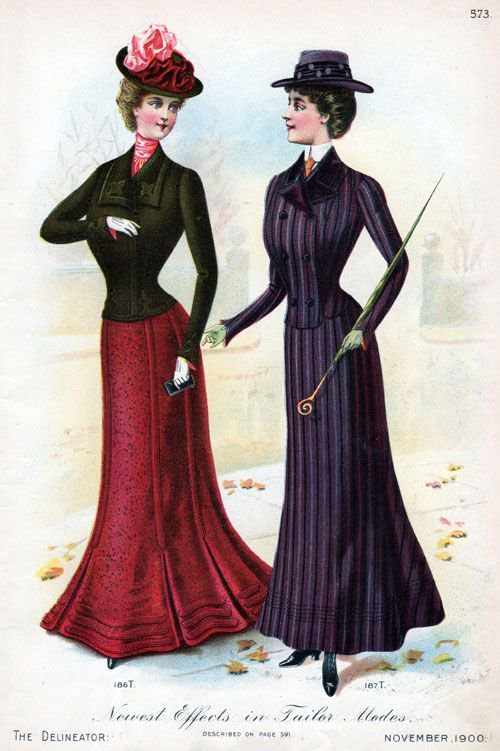
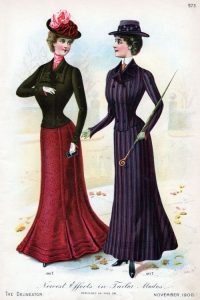
So today I have a second video in what I think is going to become a series around here, of adapting historical details and silhouettes into something that would be comfortable to wear out on the street today. I’ve been long enamoured by the turn-of-the-century walking skirt: that clean, smart silhouette, the delicate flare, and that fun little bit of pleating just at the back.
 So my next new addition to the wardrobe is going to be this: a modern adaptation of the Edwardian walking skirt. Fortunately I found a fantastic pattern for the historical version of this by the company Truly Victorian. This pattern, according to the notes included, was taken directly from an existing pattern originally published by the Metropolitan Pattern Company in 1898.
It was super important to me that I start with a real contemporary pattern or garment so that I truly understand the historical origins of the skirt, and my finished, adapted skirt will hopefully still retain its historical essence. It comes with a good range of sizes, and I never like to cut off the larger sizing lines in case I ever decide to reuse the pattern; it just saves Future Me the headache of having to grade all the pieces, so I’m just folding the unnecessary bits out of the way for now. I like my skirts to fall below the knee, so I’m just measuring down 26 inches from the waist edge to figure out the new length of the skirt.
Of course you can lengthen or shorten this to your fancy, but just be aware that since the skirt is cut in gores, meaning that they get wider at the hem, you may have to add a bit more width into the hem if you decide to make it really short, since all the flare on this pattern starts to happen round the knee area. I’m going to be making the skirt out of this nice black cotton stripe I bought in the garment district a few months ago with this very project in mind, so I’m really excited to finally be getting around to it. Can you tell I’ve come home from Costume College overflowing with sudden new motivation to do ALL OF THE SEWING? And once again, I haven’t cut the pattern on my new marked lines in case—in the very probable event— I decide to make a full-length walking skirt one day. Also—this should go without saying, but when working with a printed pattern, always be sure to read the instructions thoroughly before starting your project. This pattern comes with a half-inch seam allowance included, so there was no need to add any on in cutting.
 The waistband is cut on the fold, but since I’ve decided to align the stripes horizontally here, I’ve decided to cut it flat so I could be sure the stripes were going exactly in the right place. You know what’s interesting, is that since I’ve started working original practice for my historical recreations, I’ve found that my everyday sewing is so much neater since I’m now so much more willing to take the time to do the small precision tasks that really make a finished garment look nice and neat. The instructions say to flat line the skirt, and this agrees completely with my instinct. I picked up a few yards of this lightweight black cotton that I’ll use to back my skirt panels.
If you’re not familiar with the process of flat lining, basically it’s this: instead of making up two complete garments—that is, the fabric layer and the lining layer, then stitching them together, flat lining is when you secure both layers together as individual panels, then treat them as one piece during further assembly. While it doesn’t enclose the raw seam edges like regular lining does, it provides a crucial inner layer of material to catch stitches so you don’t have to see any stitching on the outside of the garment. Flat lining is, I believe, also generally the more historically common way to line garments. Before we start putting the skirt panels together, I’m first going to cut out some facing pieces. Historical walking skirts are generally constructed with wide borders of stiff material at the hem to hold the bottom of the skirt out in a nice bell shape. I’ve decided to honor this practice by experimenting with putting it in on my shortened hemline. I’m not sure if it will work out, but I’m going to cut all the pieces and make it up anyway just to see if it works.
 So I’m just cutting out these facing pieces, one set from the flat lining and then another set from a heavy cotton twill that will add weight and shape to the hem. You’ll notice that I also cut some stiffener pieces for the waistband and the placket strip, which the instructions didn’t say to do but I wondered if they might be nice to have. It turns out they weren’t necessary, since my main fabric actually has quite a decent body to it, so we shan’t be seeing them again. Now because the facing pattern pieces are actually intended to cover the wider width of the hem at the bottom of the longer skirt, the given pieces are much too long for my shorter, narrower panels. However because I didn’t trust myself to math well enough to work out the decline of width to my new hemline, I decided to just cut the full pieces, then match them up to my new pieces and trim them down accordingly.
Now it’s time to begin flat lining. I’m just laying my pieces together, matching up the shapes and making sure the grain is smooth before pinning it into place. Then I’m basting all of the edges so that they don’t try and slide around while I stitch the seams together. This takes a bit of time; even with wide basting stitches, there are still 7 skirt panels and 7 more facing panels to do, so be sure to plan for this. You can probably get away with just holding it in place with the pins while you stitch, but be aware that the pins actually do force the fabric into a shape that isn’t perfectly flat, so you may end up with a bit of a baggy or off-grain lining in the end.
Again, it’s these little precision tasks that really help to keep your finished garment nice and clean. Putting some tension on the end of your seam—whether by pinning it to a cushion or by just…stepping on it…will help your stitching go a bit quicker. So now that we have our pieces all prepared, it’s time to get to assembling the skirt. The instructions say to begin with the center back seam and get the placket in place before seaming together the rest of the panels, so that’s what I’m starting with.
The closure placket extends 9 inches down from the waist edge, so I’m going to leave this much open at the top and stitch together the rest of the seam. It’s always a good idea to press your seams as you go, since the garment only gets more complicated, and it’s nice to be able to get some good, clean pressed seams while it’s still flat and manageable. And while I’m here, I’m just going ahead and pressing the placket, which just gets folded in half. The instructions say to fold back the half-inch seam allowance on the open edge of the center back seam and top stitch these into place.
 Then the placket square just gets pinned onto the wrong side of the left skirt panel and stitched carefully over the original topstitching line. I should note that the instructions say to overlock the raw edge of the placket before attaching it so that it covers the raw edge of the skirt seam allowance, but I just can’t bring myself to do it. Even if I had an overlock machine. You will only pry hand felled hems from my cold, dead hands. Once the seam is stitched securely together, you can remove your basting threads. I’m finishing these edges in my usual historical manner, by clipping the underside of the seam allowance, then folding the upper edge over to hide the raw edges. I’m only doing this on the lengths of the seam that won’t be covered by the facings, just to save a bit of time.
It’s secured down with a felling stitch, which catches only the flat lining layer and won’t be seen from the front of the skirt. And the same thing happens to the placket edge, as well as the edge on the other side of the skirt opening. Then it’s just a matter of seaming together the rest of the skirt panels. I’m leaving one side of the skirt seams open for now, just so that I can press all the other seams more easily while the garment is flat. While I’m at the machine, I’m also going to go ahead and stitch together the facing panels.
So I was just going through and cleaning up my seams, trimming threads and taking out my basting when I realized I have actually made a very grave error, and that is I forgot to put in pockets! How on earth can I be a woman of the 21st century and forget to put pockets in my skirt? That is not okay. So I’ve gone ahead and I’ve held the skirt up to my waist and determined where I want the pocket to sit and put a little pin mark in there. I’m going to rip out these seams and add in a pocket because that’s very necessary.
So I’m just cutting out some pockets from my flat lining material. I’m only cutting two pieces, since I decided only to add one pocket into the left side seam of the skirt. And the space between these marks gets unpicked so the pocket can go in. The pocket shapes are pinned to the right side of the skirt and stitched into place. These are then pressed inward to give a nice sharp edge to the pocket opening. Whilst I’m here, I’m just going ahead and pressing open all of my seams, since I didn’t yet do that before I had my pocket revelation. Then I’m just finishing off this pocket business by stitching it all around, and into the skirt seam.
 Then I can go ahead and close the skirt by seaming together that last open seam. Then I can finish off all these skirt seams. For the center back seam, you’ll have noticed, I finished each side separately since there’s a split in the seam for the placket; but since the rest of the seams are closed, I’m just folding them all together to save the effort of finishing them separately. I know there has to be an easier, quicker, probably machine-done way to finish off flat lined seams in modern garments, but I literally have no idea what it is, so I’m resorting to my usual historical antics with my hand felling. At this point I’m quick enough at it that it doesn’t feel a chore; and honestly, I rather enjoy it.
And, you know, you’d be surprised how much hand work is still employed in fine couture sewing today; so I’m not old fashioned, I’m couture. But feel free to finish your seams however you like; just don’t be sure I’m not around to witness the dreaded overlock. Before I attach the waistband, I’m just running two gathering threads into the back panels. The pattern has conveniently marked notches where the gathering is supposed to end. I’ve just pressed the waistband in half to create that nice clean folded edge at the top.
Then I’ve marked the center point: not at the actual center of the waistband, but one inch to the right, so that the left side is longer where the placket extends. Then with right sides together, I’m pinning only the nearer layer of the waistband to the skirt, up to to the two notches where the gathering threads start. Then I’m gently gathering the back panels of the skirt to fit into the remaining bit of waistband. I spent quite a while doing this, ensuring that my gathers were nice and even, almost like tiny cartridge pleats, since this is such an interesting design feature in the back of the skirt and I really wanted it to look smart.
Then I can stitch the underside of the waistband in place. I don’t think you can see it here, but I’ve actually folded in the half inch of seam allowance at the end of the waistband so that I don’t have to wrestle with it later. Then I can just fold the bottom edge of the waistband under half an inch to hide all of the grubby edges and slip stitch it into place.
The skirt is closed with two pairs of hooks and eyes at the waistband. I’m just using some size 3 black hooks, secured with a heavy silk thread. The instructions were rather vague about this, but this is what I’m assuming is supposed to happen; the placket opening remains unfastened, but the one inch extension, as well as the closeness of the gathered folds, ensures that everything remains nice and closed back there. So now it’s time to test out this facing thing and see if we like it. I’ve just gone ahead and pinned the hems together with right sides facing, then am stitching them together. Then I’m just securing the hem where I want the edges to fold, and tucking under the upper raw edge. This edge is secured into place with a small felling stitch.
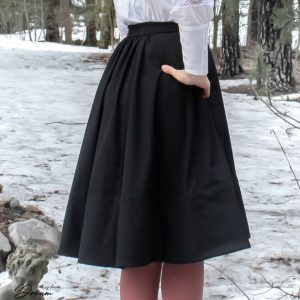
And the skirt is complete! When I first put it on, I was really quite unhappy with how the facing made the skirt stick out, but just as I was about to rip it all off, I put the skirt on again with the shoes and the hair and I actually sort of liked it. You’ll notice all throughout history, the fashionable silhouette is always so carefully balanced. The hair, the shoulders, the neckline, waistlines, skirt shapes—they all somehow work together to balance each other out, and messing with one can often throw off the look of the outfit completely.
This was very subtle, I know; but I’m still always amazed at how all that works. Anyway, I’m actually very happy with how the skirt turned out in the end—with the facing. And so that is all for this little adventure. I hope I’ve maybe inspired you to pick up your own unique sewing project, to pepper a bit of historical delight onto your wardrobe, or at least that I’ve provided a bit of pleasant company. If you are already a regular visitor to these parts, then I shall greatly look forward to seeing you soon on my next historical sewing adventure.
